
Keep your data safe by encrypting your hard drive
Encryption has turned into a bit of buzz word these days in regards to technology security. However, it is much more then just a buzz word. It’s a very important step when it comes to securing your data.
Encryption can be used by those who just want to keep their data safer, or by those who are required to encrypt their data by law. For those who have to adhere to specific data protection laws, such as HIPAA, encryption is of the utmost importance.
It is very important to, at least, encrypt your main system drive and any other internal hard drives in your computer that store data. Encrypting external USB drives may be required if you store important data on those drives as well.
Windows 10 provides two ways for you to encrypt your data
On Windows 10, there are two different ways that you can enable encryption. To see if your computer supports encryption out of the box you can go to Settings > Update & Security > Device encryption. If Device Encryption is not an option within your settings, then you will have to use a feature called BitLocker. If Device Encryption is available to you in settings you can simply click Turn On to enable encryption, if it is not already turned on.
If you do not have Device Encryption as an option within your settings, you can use BitLocker to encrypt instead.
Note: BitLocker is only available on Windows 10 Pro. You can find out which version you have by going to Settings > System > About. Learn how to upgrade from Windows 10 Home to Pro.
To turn on and use BitLocker you will need to open Control Panel > System and Security > BitLocker Drive Encryption. Within that control panel window you will see all hard drives that are installed in your computer under Operating system drive and Fixed data drives. You can choose to Turn on BitLocker on all drives that you wish to encrypt.
You may be greeted with this screen stating that “This device can’t use a Trusted Platform Module”:
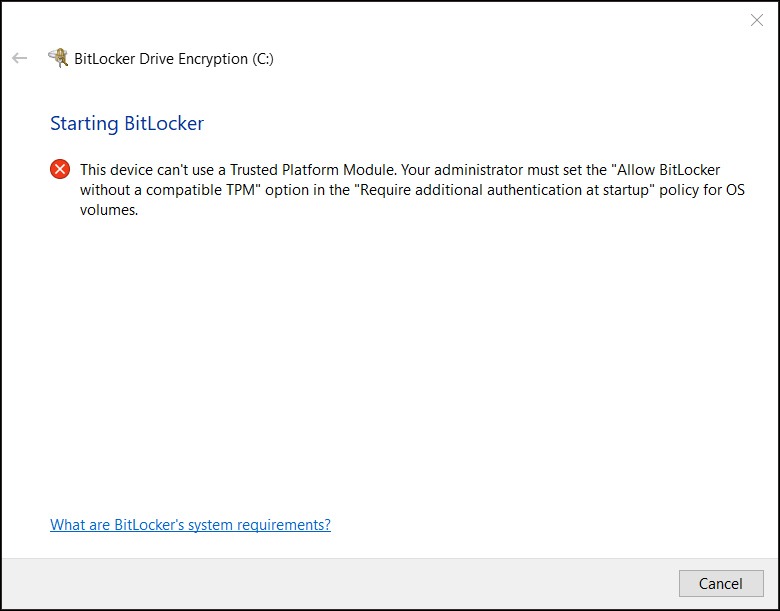
This means that your computer does not have a hardware encryption chip in it, which is OK. You can get around this by changing a few settings within Windows.
Enabling BitLocker without TPM
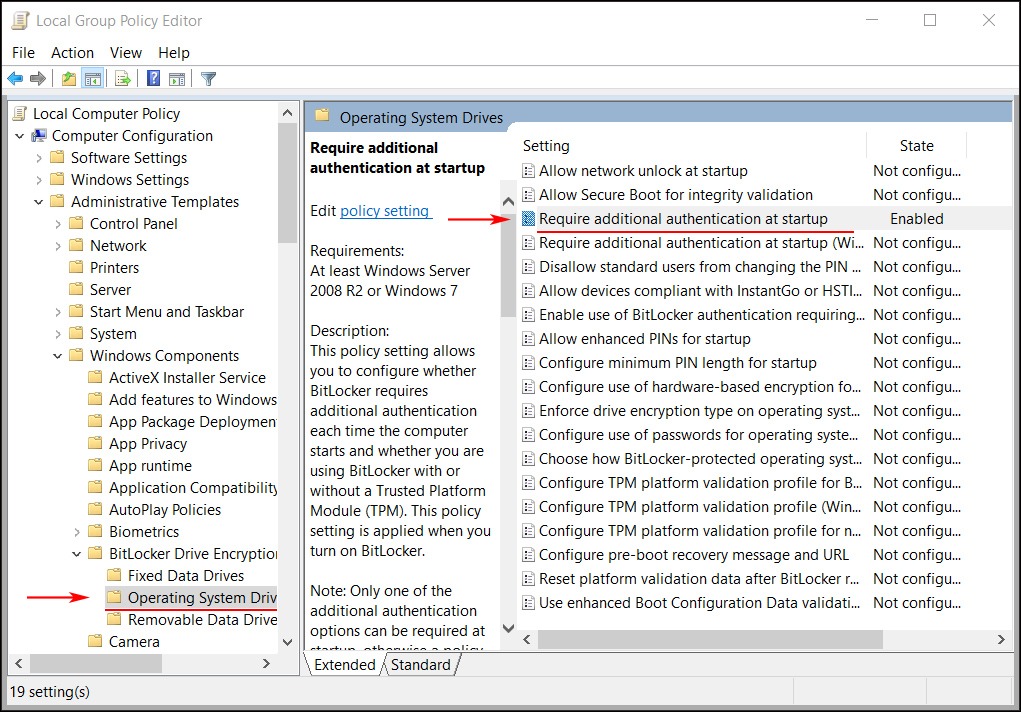
Press the Windows key + R on your keyboard to bring up the Run dialogue. Type in gpedit.msc and hit Enter or click OK. Local Group Policy Editor will open. Inside of this screen, on the left hand side, navigation to Computer Configuration > Administrative Templates > Windows Components > BitLocker Drive Encryption > Operating System Drives. On right right side of this screen, double click on Require additional authentication at startup.
Within this screen select Enabled, and make sure that Allow BitLocker without a compatible TPM (requires a password or a startup key on a USB flash drive) is checked.
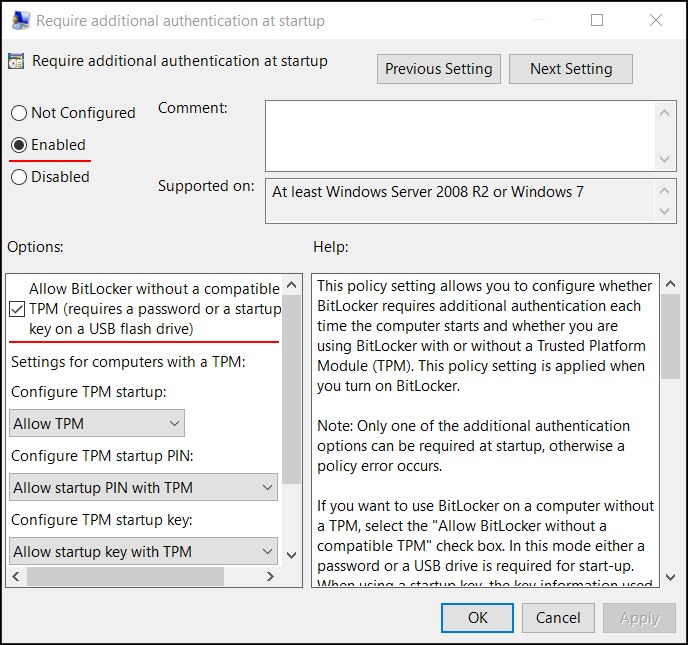
Once you have changed those settings click OK. You can now go back to Control Panel > System and Security > BitLocker Drive Encryption and click Turn on BitLocker on all of the hard drives that you wish to encrypt.
Setting up BitLocker
You will then be asked to Choose how to unlock your drive at startup. You can choose to use a password, or you can designate an external USB flash drive as the unlock key, which will have to be plugged in to your machine every time that you turn it on. Which option you choose is up to you.
You will then be given a choice to save a recovery key in order to regain access to your files in the event that you forget your password or lose your USB flash drive. This is very important as this is the only way to recover your data if you cannot use your password or USB flash drive.
You can choose to save your recovery key to your Microsoft account, a USB flash drive, a file, or print your recovery key. It is recommended that you choose more then one of these options. The simplest options are to save the recovery key to your Microsoft account and to print it and store it in a safe place.
You will then be asked to Choose how much of your drive to encrypt. If this is a brand new computer you can safely choose Encrypt used disk space only. If this computer has been in use it is best to choose Encrypt entire drive.
Finally, you will be asked to Choose which encryption method to use. If this is an internal hard drive, one that is not removable, you should choose New encryption mode. If you are encrypting an external USB hard drive or flash drive you should choose Compatible mode.
You will now be prompted to Run BitLocker system check. It is advisable that you check this and proceed with the system check. Your system will make sure that everything works before encrypting. Your computer will restart at this point and you will be asked to put in your password or insert your USB flash drive to boot the computer. This is done to make sure that the unlock method you chose works properly before the encryption process begins. Once the computer reboots successfully the encryption process will begin. It may take quite a long time to complete, which is OK. Let this process complete before turning off your machine.
Verifying that your hard drive is encrypted successfully
Once you have gone through the process of encrypting, you should verify that everything succeeded.
If you were able to encrypt through Windows settings, you can navigate to Settings > Update & Security > Device encryption to make sure that encryption is enabled.
If you encrypted using BitLocker you can open Windows Explorer and navigate to This PC on the left hand side. If there is a lock icon on your hard drive, that means that hard drive is now encrypted.
Wrapping everything up
At this point your computer should now be encrypted! This means that your data will be safe if your machine gets lost or stolen. It is worth noting that encryption can cause minor slowdown on some machines. Depending on the specifications of your machine, you may or may not notice this.
Have questions about encryption? Contact us or leave a comment down below.
Join The Discussion
No comments (0)